

When the phone rang in spring, a very special conversation ensued: the young pupil Till had chosen a great challenge for his year's work in Year 8 at the Waldorf School in Karlsruhe: He wanted to set to work recreating a canoe from birch bark, true to detail, as a floating model. Till is by no means the only person to build canoes from sagaan bark, as was common in Canada and Russia in the past. But he is certainly the youngest canoe builder to complete this masterpiece as part of his project work. Just a few months later, he reports on his approach and describes the construction of his birch bark canoe step by step:
In advance: Many, many thanks to the Sagaan company! They supported me in my project by providing me with the birch bark I needed for my boat.
How my canoe model was made from birch bark
Before anything is put into practice, it should be recorded and the dimensions written down.

The base board
The size and shape of the canoe is determined and drawn on a board. To ensure that both sides are symmetrical, nails are hammered into the board, a moulding is bent around them and a line is drawn along it.
Five holes are drilled into the board on both sides along the shape of the boat to insert rods into the board. They are there to bring the bark into the shape of the boat.

The coaming
The coaming consists of two battens per side, i.e. four battens in total. The birch bark is clamped between the two battens on each side. This joins the coaming and birch bark together.
To ensure that the coaming retains its shape, there are crossbars that are placed in between. The crossbars have holes so that they can later be sewn to the coaming and the birch bark.
After the mouldings for the coaming have been soaked, they are bent into the shape of the boat using the base board and nails. They then have to dry for a while.

The stamp piece (bow moulding)
A stamp piece is a slightly thicker bent strip that stabilises the bow or stern. To prevent it from breaking when bent, it is split into several parts. First mark how deep the stamp piece should be split. It is then clamped in a vice at the mark so that it is split with a knife only up to the mark. In order to be able to bend the stamp piece properly, it is soaked in water. It can now be bent until it forms a 90° angle when viewed from the ends. It is then wrapped with string so that it dries in the mould. Before the stamp piece is installed in the boat, the ends are sawn to the right size.
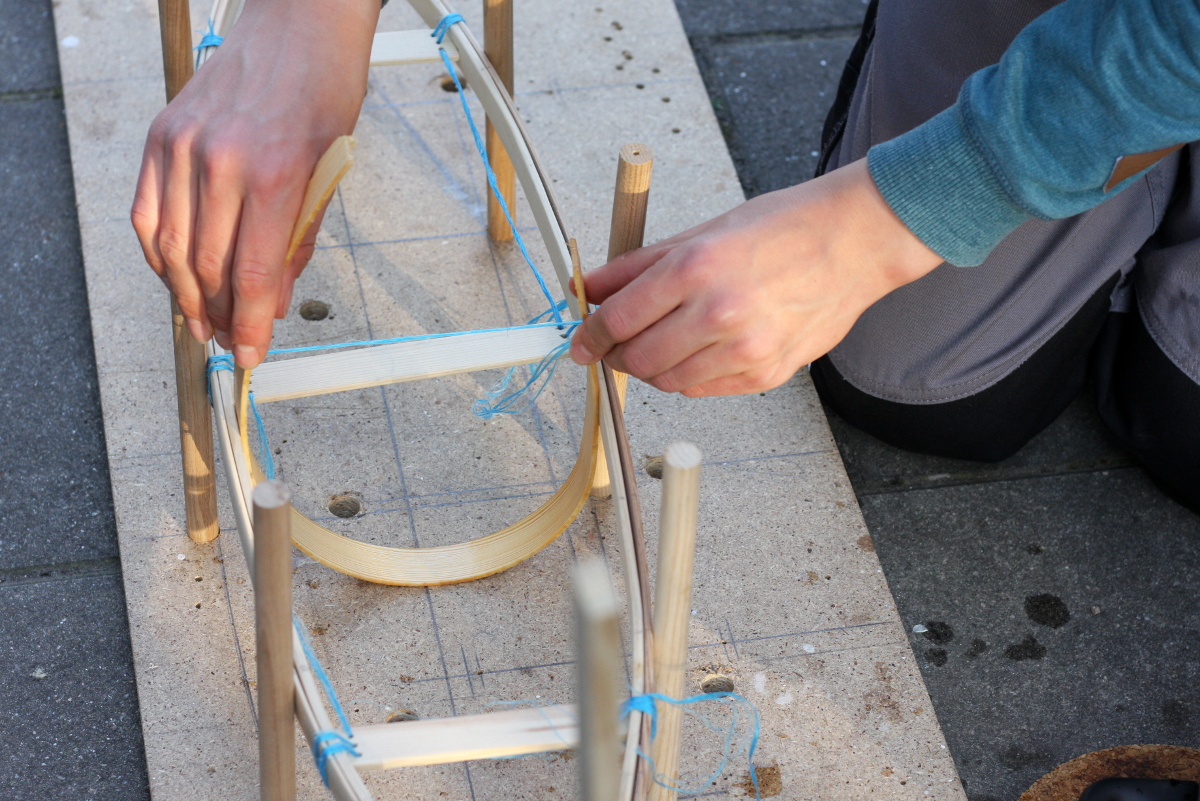

The frames
A rib is a thin moulding that tensions the birch bark and at the same time forms a kind of rib in the boat. This tension stabilises the boat. The ribs are clamped on both sides between the inner moulding of the coaming and the birch bark. They hold the shingles in place.
To prevent the rib from breaking during bending, it is doused with hot water and then boiled in a pan for 5-10 minutes. Then it is slowly clamped between the coaming so that it can dry. After drying, it retains its shape.
The shingles
The shingles are mouldings that lie on the bottom of the boat. They are cut to a suitable size and put together like a jigsaw puzzle. The shingles go quite far up the side of the boat, as they help to stabilise the boat. As already mentioned, they are held in place by the frames.
Assembling the canoe
To be able to bend the birch bark, it must be doused with hot water. The bark must be cut in certain places so that it moulds to the shape of the boat. Next, the coaming is sewn to the bark, and the cuts are of course also sewn. It is important that there are places on the coaming that are not sewn so that the frames can still be pressed between the inner coaming and the bark. There are various materials that can be used for stitching. The main thing is that they are stable, can be bent and do not break. To be able to sew, holes are drilled into the bark. The stitching material can now be inserted through the holes and the cuts sewn. Next, the stamp piece is inserted and sewn. The shingles are then inserted into the boat and secured with the frames. The frames are sawn off so that they have to be pressed into place from the side. The respective ends are pressed into place in the gaps between the seams. Now the seams need to be sealed and the boat can go into the water.

The bark was cut off close to the coaming so that it could then be sewn up.

The coaming is sewn

Now everything is sewn up

The shingles are fitted last, as are the frames that hold the shingles in place
This is what the finished boat looks like:

Want to try it yourself?
-
 Canoe bark - birch bark for traditional canoe building170,00 €
incl. 19% VAT
plus. Shipping costs