
Familiarise yourself with the secrets of birch bark and get to know one of the most fascinating materials that nature gives us.
The craft set is the best place to start.
→ Here you can download the instructions as a pdf file
→ Here you can find the tutorial for making a box out of birch bark to download as a PDF file: sagaan Birch Bark container DIY set step-by-step instruction
Note: The following instructions deal with a product that we have improved and enlarged in the meantime.
The new DIY craft kit for a Birch bark box can be found in our shop, which Instructions can be downloaded free of charge.
Scope of delivery and required tools
 We deliver this with a Ordering the blanks:
- 1 piece of bark for the outer wall 215 x 50mm (long).
- 1 piece of bark for the inner wall 205 x 50 mm (short).
- 1 pine wood shelf.
- 1 lid made of pine wood, with cone on the rim and slots for the handle.
- Sufficient Thread for sewing.
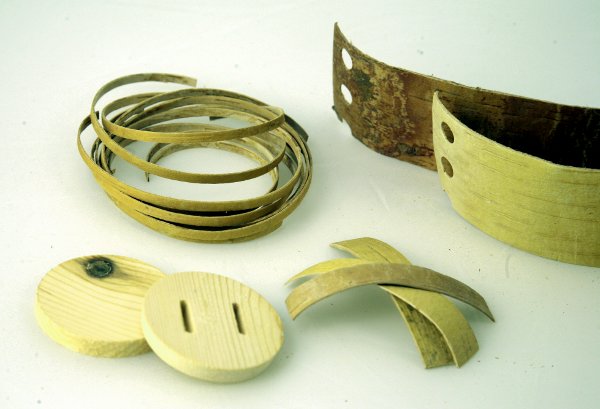
- 2-3 pieces of bark for the handle.
- a piece of bark for decorating the lid, if required.
The following tools are required:
- A pair of scissors.
- A small bowl of hot water (approx. 50° C).
- Punch pliers as used in leather processing.
- Some white glue (wood glue) if you want to glue a decoration on the lid.
Build the can
1. cut the walls to size and stick them together
 a) Cutting to size
Mark and cut tapered cuts into the holes on one side of the inner wall and one side of the outer wall.
Please note:
- Only cut on one side of each wall at a time.
- The incision must be as small as possible on the side of the holes, but large at the edge to create an arrow shape.
- The incision must reach the holes so that 2½ individual „arrows“ are created.

b) Place the bark in warm water.
Soak until soft and pliable (approx. 15-60 seconds depending on heat and rind).
 c) Assemble outer wall
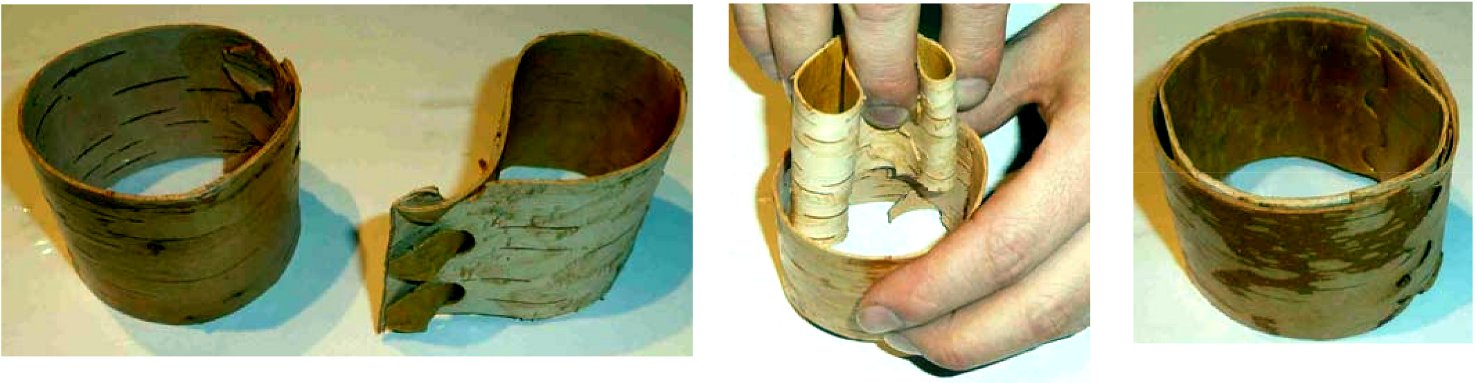
Bend the bark, light side inwards. Insert the flaps („arrows“) into each other from the outside inwards to form a round body.
 d) Assemble the inner wall
Bend the bark, light-coloured side outwards. Insert the flaps („arrows“) into each other from the inside to the outside to form a raindrop-shaped body.
2. insert the walls into each other
Place the inner wall into the outer wall. To do this, grasp between the closely fitting ends of the inner wall at the tip of the „raindrop“ and press them apart, pushing the wall in until it meets the opposite side. This way it fits into the outer wall.
When inserting, make sure that the ends of both wall locks do not fold over. The locks should not rest on top of each other at one point.
Note:
Birch bark boxes are always double-walled. The light-coloured sides are placed against each other so that they and the plug connections disappear. The golden-yellow layer is visible and tactile.
3. sew the walls together with birch bark thread
a) Punch holes
Punch evenly spaced holes in the wall on the top side using a hole punch. Distance to the edge: 7-10mm, seam hole frequency: approx. every 7 to 10mm.
Please note:
Do not make the openings narrower than every 5 mm. This area is the most vulnerable, as the bark can easily tear here. The bark on the longitudinal lenticels is particularly vulnerable.

b) Sewing
 Place a thread around the can between the seam holes and the edge. The thread reinforces the seam. Now feed a slightly sharpened thread through the hole and carefully push it through with your thumb. If you need several threads, sew 1-2 holes twice to hold the thread in place. Also double stitch the ends. Cut the end off tightly or feed it back through the hole a second time to reinforce it and then cut it off. If desired, the bottom of the box can also be sewn with a seam
Please note:
- Never pull hard on the thread, it will break easily.
- It is best to always press firmly so that the thread lies tightly.
- The thread can be softened with a neutral-flavoured cooking oil, warm water or light soaping. The soap can be washed off later.
- You can also sew by inserting the ends between the two walls.
- You can also use an awl, a sharp knife or a similar object to carefully push the thread through if it is difficult. The single thread should pass through the hole quite easily, a double thread should already be holding firmly.
4. insert the base
Soak the bottom of the birch can in hot water for approx. 1-2 minutes. This causes the bark to expand and become soft. Now place the base upright in the tin. If both sides have been sewn, the lid must be completely between the seam. Now fold it over so that it lies flat in the tin. Press it carefully into position with your fingers or a blunt object.
It is now firmly in place.

Making the lid
The lid already has a cone so that it can be easily placed on the can, as well as slots for the handle.
1. cut out and glue on the decoration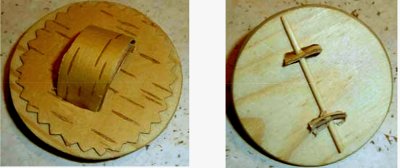
If desired, the first step is to cut out the decoration from birch bark and glue it to the upper side of the lid (where the cone is wider). The decoration can be cut out round in the shape of the lid or, for example, in a star shape (using zigzag scissors). The birch bark is then also slit at the location of the Henkell holes.
2. insert handle
Now take 2-3 handle pieces. Cut them exactly to the width of the handle slits on the lid and taper them slightly at both ends.

Now pull the handle from the top of the lid through the slits on both sides. Once pushed through, you can insert one or more pieces of bark between the handle pieces from the underside and pull the handle back slightly so that the handle is wedged into the lid. The handle is now firmly in place.
 If desired, it can now be sanded to the level of the cover.
Alternatively, the handle slits can also be pulled well beyond the inside edge of the lid. A toothpick is pulled through a previously drilled or pierced hole to secure it.
